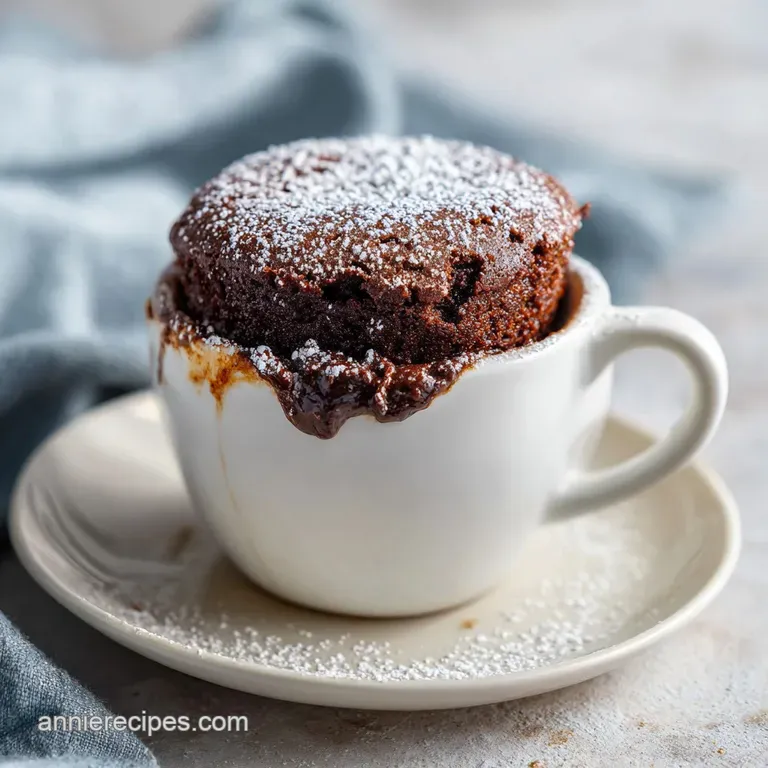
Quick 1Minute Microwave Mug Cake: Rich and Fudgy
- Time: Active 2 minutes, Passive 1 minutes, Total 3 minutes
- Flavor/Texture Hook: Pillow soft and intensely chocolatey
- Perfect for: Late night cravings and budget-friendly solo treats
- Create a quick 1minute microwave mug cake
- Why Cocoa Powder Rules the Mug
- Performance Checkpoints for Fast Results
- Smart Ingredient Choices and Swaps
- Essential Tools for Quick Baking
- Stepping Through the Rapid Method
- Avoiding Common Mug Cake Fails
- Budget Flavor Hacks for Variety
- Storage and Zero Waste Tips
- Best Pairings for Speedy Treats
- Recipe FAQs
- 📝 Recipe Card
Create a quick 1minute microwave mug cake
That sharp, earthy scent of cocoa hitting hot steam is basically a hug in a cup. We've all been there: it is 10 PM, the fridge is empty, and you need something sweet immediately. You don't want to preheat an oven for twenty minutes just for one serving. You want chocolate, and you want it now.
This specific method is my go to because it skips the egg entirely. Eggs in the microwave usually lead to a rubbery, sponge like texture that feels more like a bouncy ball than a dessert. By focusing on the fat content from the oil and the lift from the baking powder, we get a result that is actually tender.
It is fast, satisfying, and uses things you already have in the back of your cupboard.
Forget those dry, sad cakes you've tried before. We are looking for a glossy batter that transforms into a dark, rich crumb in exactly 60 seconds. It is a total kickstart for your mood without breaking the bank on expensive gourmet bars. Let's get into why this works so well.
Why Cocoa Powder Rules the Mug
No Egg Architecture: Eliminating the egg prevents the protein from over coagulating into a rubbery mass during rapid heating.
Oil Based Moisture: Neutral oil stays liquid at room temperature, ensuring the cake feels silky and moist rather than stiff.
Hydration Bloom: The hot milk hydrates the cocoa powder instantly, releasing deep flavor notes without a long bake time.
Structure Set: A short rest period allows the starch to firm up, preventing the cake from collapsing when you take the first bite.
| Method Type | Total Time | Texture Outcome | Budget Impact |
|---|---|---|---|
| Fast Microwave | 3 minutes | Velvety and moist | Very Low |
| Classic Oven | 35 minutes | Crisp edges, airy | Medium |
| Box Mix | 5 minutes | Consistent but pricey | Medium High |
This comparison shows why the microwave wins for efficiency. You get 90% of the quality in about 10% of the time. The budget impact is key here you are using pennies' worth of flour and sugar instead of a three dollar box mix or half a stick of butter.
Performance Checkpoints for Fast Results
| Ingredient | Science Role | Pro Secret |
|---|---|---|
| Cocoa Powder | Flavor and structure | Sift if it looks lumpy for a smoother crumb |
| Baking Powder | Chemical leavening | Check expiration; old powder means a flat cake |
| Whole Milk | Fat and hydration | Use room temp milk to keep oil from clumping |
| Neutral Oil | Moisture retention | Avoid olive oil; it overpowers the cocoa |
A quick tip for the road: always use a 12 ounce mug. If you go too small, you'll be cleaning chocolate lava off your microwave floor for twenty minutes. If you go too large, the cake spreads too thin and dries out. 12 ounces is the sweet spot.
Smart Ingredient Choices and Swaps
The hero here is the Unsweetened Cocoa Powder (2 tbsp). I chose this because it is a budget powerhouse. Unlike expensive baking chocolate that needs melting, cocoa powder is ready to go and shelf stable for ages. It provides that deep, dark color and a slightly bitter edge that balances the sugar.
If you try to swap this for hot cocoa mix, the cake will be sickly sweet and won't have enough structural "body" to stand up.
- 1/4 cup All purpose flour (30g): Standard flour works best for a sturdy crumb.
- Substitute: Oat flour. Why this? It adds a nutty flavor but makes the cake slightly denser.
- 2 tbsp Granulated sugar (25g): This provides sweetness and keeps the cake tender.
- Substitute: Brown sugar. Why this? Adds a hint of molasses and extra moisture.
- 1/4 tsp Baking powder: This is what makes it rise in 60 seconds.
- Substitute: 1/8 tsp baking soda + 1/4 tsp lemon juice. Why this? Creates the necessary gas bubbles for lift.
- 1/8 tsp Salt: Essential to make the chocolate flavor pop.
- Substitute: Sea salt flakes. Why this? Provides little bursts of saltiness if not fully mixed.
- 1/4 cup Whole milk (60ml): Adds fat and creates the batter.
- Substitute: Water. Why this? Works in a pinch, but the cake will be less rich.
- 2 tbsp Neutral oil: Keeps the texture soft.
- Substitute: Melted butter. Why this? Better flavor, but the cake hardens faster as it cools.
- 1/2 tsp Vanilla extract: Rounds out the chocolate notes.
- Substitute: Almond extract. Why this? Gives it a cherry like, marzipan vibe.
Mixing these ingredients is all about speed and simplicity. You don't need a stand mixer or even a bowl. Everything happens right in the mug, which means only one thing to wash. That is the kind of efficiency I live for.
Essential Tools for Quick Baking
You don't need much, but the right tools make this faster. A 12 ounce ceramic mug is your best friend. Make sure it is microwave safe some cheap mugs with metallic paint can spark, and that is a disaster nobody wants.
A small whisk is better than a fork for getting into the bottom corners where flour likes to hide.
I also recommend a set of standard measuring spoons. Since we are working with small amounts, being off by half a teaspoon of baking powder can ruin the whole thing. If you want to be super precise, a small kitchen scale is great, but for a quick 1minute microwave mug cake, spoons are usually fine.
Stepping Through the Rapid Method
- Grab your 12 ounce mug and toss in the flour, sugar, cocoa, baking powder, and salt.
- Whisk the dry stuff until it's one solid color. Note: This prevents clumps of baking powder from tasting bitter later.
- Pour in the milk, oil, and vanilla extract.
- Whisk vigorously for about 30 seconds. Stop when the batter is smooth and glossy.
- Scrape down the sides with your whisk or a tiny spatula.
- Pop it in the center of the microwave.
- Cook on high for 60 seconds. Watch for it to rise and go slightly tacky.
- Pull it out carefully the handle might be hot.
- Wait 30 seconds before diving in. Note: This lets the steam finish the job so the cake isn't wet.
- Dig in while it's still warm.
Chef's Tip: If you want a molten center, push a single square of dark chocolate into the middle of the batter right before you microwave it. It melts into a gooey pool while the rest of the cake sets.
Avoiding Common Mug Cake Fails
Why Your Cake is Rubbery
This usually happens because of the "egg effect" or overcooking. Since we skip the egg, the most likely culprit is leaving it in the microwave too long. Every microwave is different. If yours is a 1200 watt beast, you might only need 45 seconds. If it's a small dorm style unit, 70 seconds might be the winner.
Why the Bottom is Gummy
Flour is heavy. If you don't whisk properly, a layer of dry flour or unmixed oil sits at the very bottom. When you go to eat it, you get a weird, sludge like surprise. Always use a fork to "dig" into the corners of the mug during the mixing phase.
| Problem | Root Cause | Solution |
|---|---|---|
| Dry and crumbly | Too much flour or overcooked | Measure flour with a spoon and level it; reduce cook time |
| Overflowed mug | Mug was too small | Use a 12 ounce or larger ceramic mug |
| Bitter taste | Unmixed baking powder | Whisk dry ingredients thoroughly before adding liquid |
Common Mistakes Checklist
- ✓ Using a mug smaller than 12 ounces (causes a huge mess).
- ✓ Forgetting to whisk the bottom corners (leaves flour pockets).
- ✓ Skipping the salt (the chocolate will taste flat and boring).
- ✓ Eating it immediately without the 30 second rest (the crumb won't be set).
- ✓ Using an oil with a strong flavor like extra virgin olive oil.
Budget Flavor Hacks for Variety
You don't need a fancy pantry to change things up. If you have a jar of instant coffee, add a pinch to the dry mix. It doesn't make it taste like coffee; it just makes the chocolate taste ten times more intense. This is a classic baker's trick that costs almost nothing.
Another cheap win is using spices. A shake of cinnamon and a tiny pinch of cayenne turns this into a Mexican hot chocolate cake. It gives a warm heat that is incredibly satisfying on a cold night. Or, if you have peanut butter, drop a teaspoon on top after 30 seconds of cooking.
It will sink in slightly and create a marbled effect.
- If you want a "Lava" effect: Add a tablespoon of water on top of the batter right before cooking. It creates a fudge sauce at the bottom.
- If you want it vegan: Use almond milk or soy milk and ensure your sugar is vegan friendly.
- If you want more crunch: Fold in some crushed pretzels or a few chocolate chips if you have them.
Storage and Zero Waste Tips
Let's be honest, you probably won't have leftovers. But if you do, this cake stays okay for about 24 hours if you wrap the top of the mug in plastic wrap. Don't put it in the fridge; it will turn into a rock. Keep it on the counter. To reheat, just zap it for 10 seconds to loosen the fats again.
For zero waste, if you have a tiny bit of leftover coffee in the pot, use that instead of a portion of the milk. It is a great way to use up dregs and adds huge flavor. Also, if you have any "dust" at the bottom of a cereal box (like cocoa puffs), sprinkle that on top for a bit of texture.
Best Pairings for Speedy Treats
Since this cake is rich, it needs something to cut through the density. A cold glass of milk is the traditional move, but a dollop of Greek yogurt actually works wonders if you want a bit of tang. The acidity in the yogurt balances the sugar perfectly.
If you are feeling fancy, a quick drizzle of salted caramel or even just a spoonful of jam can change the whole vibe. Raspberry jam and chocolate is a match made in heaven. Because this is a budget focused recipe, don't feel like you need to go buy whipped cream.
A spoonful of peanut butter or a few frozen berries you've thawed in the microwave for 10 seconds will do the trick perfectly. It is all about making the most of what you have right now.
Recipe FAQs
Is it true I can use any size mug for this recipe?
No, this is a common misconception. You must use a 12-ounce microwave safe ceramic mug to prevent the batter from overflowing during the rapid rise.
How to ensure the cake doesn't have dry pockets of flour?
Whisk vigorously while scraping the bottom corners of the mug. Ensure the batter is completely smooth and glossy before you start the microwave.
Why is the cake texture rubbery or dry after cooking?
You skipped the mandatory 30-second resting period. This pause is essential for the internal steam to finish setting the crumb structure, preventing an unpleasant, under baked or overly dry texture.
How to store a leftover mug cake?
Wrap the top of the mug tightly in plastic wrap and leave it on your kitchen counter. Do not refrigerate it, as the cold will cause the fats to harden and turn the cake into a rock.
Is it necessary to use a neutral flavored oil?
Yes, use only canola or vegetable oil. Stronger oils like extra virgin olive oil will overwhelm the delicate cocoa flavor and ruin the intended profile of the dessert.
How to reheat a leftover mug cake?
Microwave the cake on high for just 10 seconds. This brief heat loosens the fats again without overcooking the delicate structure of the crumb.
Can I use a fork if I do not have a small whisk?
Yes, a fork works perfectly. Just be extra diligent about whisking the dry ingredients until they are a uniform color and ensuring no clumps remain at the bottom of the mug.
Quick Microwave Mug Cake

