Buttery Canned Green Beans with Garlic

- Timing: 5 minutes prep + 10 minutes on heat
- Taste Profile: Rich garlic butter with a bright citrus finish
- Ideal for: Hectic weeknight meals or last-minute holiday additions
- Easy Buttery Canned Green Beans Recipe
- Why This Side Wins
- What Each Ingredient Does
- The Gear You Need
- Ingredients and Substitutions
- How to Cook Them
- Fixing Common Cooking Issues
- Adding Different Flavors
- Storage and Leftover Tips
- Best Side Dish Pairings
- Why You'll Love This Recipe
- Recipe FAQs
- 📝 Recipe Card
We've all been there: you've spent an hour perfecting the main course, only to realize the vegetables are missing. You spot a few cans of green beans in the cupboard, but you know that simply boiling them leads to a mushy, tinny mess. It's a disappointing way to finish a meal.
Fortunately, there's a better approach. By treating these beans as a sauté rather than a boil, you change the entire outcome. As the butter bubbles and the garlic browns, you end up with Buttery Canned Green Beans that feel like a legitimate part of the dinner plate.
The aim isn't to trick anyone into thinking they're fresh. Instead, we embrace the tender texture and add a layer of savory richness to make them feel like a deliberate choice. It's a quick, dependable method for adding greens to your plate without leaving the house.
Easy Buttery Canned Green Beans Recipe
When you're staring at a clock and the meat is almost done, you need a side that doesn't require chopping a mountain of produce. This recipe hits that sweet spot. It takes about 15 minutes from the moment you open the can to the moment you plate them.
The magic happens when the butter hits the pan. You'll hear that aggressive sizzle and smell the garlic blooming, which completely masks the "pantry" aroma. It's a simple process, but the result feels way more polished than a standard canned veg side.
Because we use a non stick skillet, cleanup is a breeze. You aren't scrubbing burnt on sugars or dealing with a dozen pots. It's just one pan, a few minutes of stirring, and a bright squeeze of lemon to tie it all together.
Why This Side Wins
The Fat Barrier: Butter coats each bean in a thin layer of fat, which creates a velvety mouthfeel and prevents the beans from feeling watery.
The Acid Balance: A splash of lemon juice at the end cuts through the heavy butter and salt, brightening the whole dish.
High Heat Sauté: Cooking them quickly in a pan rather than simmering them stops them from breaking down further into mush.
What Each Ingredient Does
| Ingredient | Role | If You Don't Have It |
|---|---|---|
| Canned Green Beans | The base texture | Frozen green beans (thaw first) |
| Unsalted Butter | Adds richness and gloss | Olive oil or Ghee |
| Fresh Garlic | Provides a savory punch | Garlic powder (use 1/2 tsp) |
| Lemon Juice | Cuts the fat/salt | Apple cider vinegar |
The Gear You Need
While basic equipment works, a few specific items make this process smoother. I rely on a large non-stick skillet because stainless steel can cause the butter to stick or brown too rapidly, and you're aiming for a smooth, golden finish.
A colander is necessary for rinsing the beans. I also recommend having paper towels or a clean kitchen towel ready. Drying the beans is often overlooked, but it is the most critical step if you want them to sauté properly instead of steaming.
Lastly, a wooden spoon or a sturdy spatula is best for stirring. Be gentle to avoid snapping the beans, but ensure you're firm enough to coat every one in that garlic butter.
Ingredients and Substitutions
Gather these items before you turn on the heat. Since this moves fast, you don't want to be chopping garlic while your butter is already foaming.
- 2 cans (14.5 oz each) canned green beans, drained and rinsed
- 3 tbsp unsalted butter Why this? Creates the rich, steakhouse style glaze
- 3 cloves garlic, minced Why this? Adds a fresh, aromatic depth
- 1 tbsp fresh lemon juice Why this? Balances the salt and fat
- 1/2 tsp kosher salt Why this? Enhances the natural bean flavor
- 1/2 tsp freshly cracked black pepper Why this? Adds a subtle heat and bite
Between any two tables, I like to remind people that the quality of your butter matters here. I usually go for a European style butter with higher fat content, which makes the sauce thicker and glossier.
| Original Ingredient | Substitute | Why It Works |
|---|---|---|
| Unsalted Butter | Vegan Butter | Similar fat profile. Note: Check for salt content first |
| Fresh Lemon Juice | White Wine | Adds acidity and a deeper, more complex flavor |
| Garlic Cloves | Garlic Paste | Convenient. Note: Use 1 tsp per clove |
| Canned Beans | Frozen Beans | Better snap. Note: Requires 3-5 extra minutes of cook time |
How to Cook Them
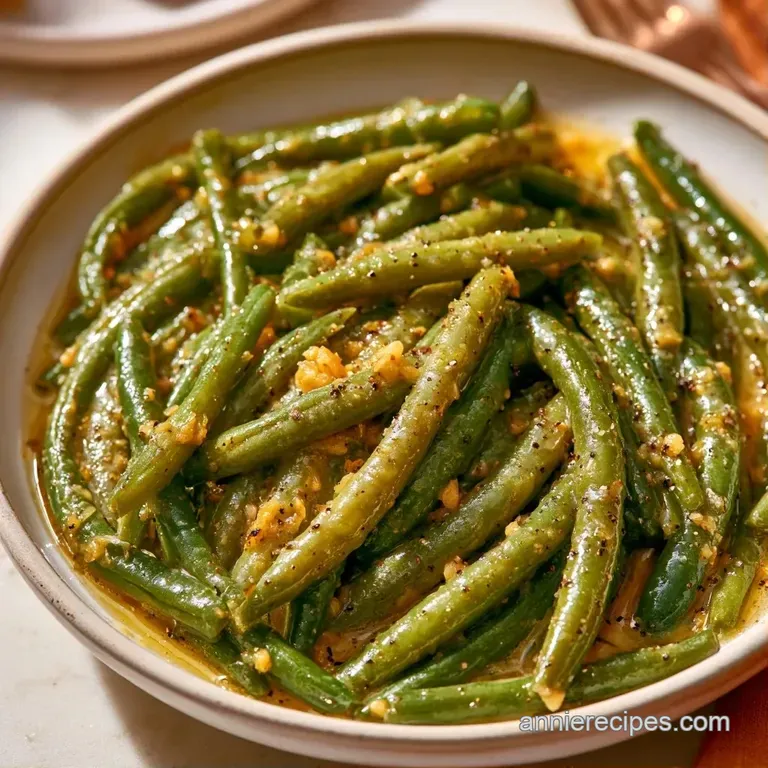
Right then, let's get into it. Follow these steps closely to ensure you get a glaze and not a soup.
- Rinse the drained green beans under cold running water for 30 seconds. Note: This removes the metallic canning liquid.
- Pat the beans dry with a clean kitchen towel. Note: Wet beans will steam and stay mushy.
- Place a large non stick skillet over medium heat.
- Melt the butter until it begins to foam and bubble.
- Add the minced garlic and sauté for 1–2 minutes until it smells fragrant and looks translucent.
- Toss in the dried green beans.
- Stir gently to coat every bean in the garlic butter.
- Cook for 5–7 minutes, stirring occasionally, until the beans are heated through and have a glossy sheen.
- Stir in the lemon juice.
- Remove from heat immediately to keep the flavor bright.
Fixing Common Cooking Issues
When making Buttery Canned Green Beans, the most common struggle is the texture. Canned vegetables are already soft, so we're just reheating them. If you overwork them, they'll fall apart.
Preventing Mushy Texture
Avoid the temptation to stir every ten seconds. Let the beans sit against the heat for a minute or two before tossing. Also, keep the heat at medium. If you crank it to high, the butter burns and the beans collapse. If they look like they're starting to shred, pull them off the stove immediately.
Eliminating the Tinny Taste
That "can" flavor comes from the preserving liquid. Rinsing is the first step, but the lemon juice is what actually neutralizes the remaining metallic notes. If you still find the taste too strong, add an extra teaspoon of lemon juice or a pinch of sugar to balance the acidity.
Stopping Garlic from Burning
Garlic turns bitter the second it goes from golden to brown. I always add the garlic only after the butter has melted and cooled slightly. If the butter is popping aggressively, wait 10 seconds before adding the garlic. Once it's translucent, get the beans in there immediately to drop the temperature of the pan.
Adding Different Flavors
One of the best things about this base is how easily it adapts. You can keep it simple or go full on comfort food. If you want something more hearty, try adding diced bacon at the start of the process. Render the bacon until crispy, then add your butter and garlic to the bacon fat. This creates a version of Southern style beans that's incredible.
For a different twist, you could try making Brown Butter Canned Green Beans. Let the butter cook for an extra 2-3 minutes until it smells nutty and has little brown specks before adding the garlic. This gives the dish a deeper, more toasted flavor profile.
If you're looking for something even creamier, you might consider a creamy casserole instead of a sauté. But for a quick side, a few simple changes to this pan method work best.
| Goal | What to change |
|---|---|
| More Heat | Add 1/4 tsp red pepper flakes with the garlic |
| Nutty Flavor | Brown the butter before adding garlic |
| Extra Savory | Stir in 1 tbsp grated Parmesan at the end |
Storage and Leftover Tips
For any leftovers, keep them in an airtight glass jar in the refrigerator for no more than 3 days. It is normal for the butter to solidify during this time.
To warm the dish, I recommend using a skillet over medium heat for 3-4 minutes. I suggest skipping the microwave, since it often makes the beans too soft and can cause the butter sauce to break. If you do use a microwave, heat in 30-second intervals and stir between each.
To minimize waste, find a use for those remaining lemon wedges. Toss them into your garbage disposal to freshen the drain, or mix the leftover zest into a salad dressing. If you used fresh garlic, store the papery skins in a freezer bag to use for a quick vegetable broth later.
Best Side Dish Pairings
These Buttery Canned Green Beans are a versatile companion. Because they're rich and salty, they pair well with lean proteins. A grilled chicken breast or a baked piece of salmon balances the butter perfectly.
If you're doing a big Sunday dinner, serve these alongside mashed potatoes and a roast beef. The acidity from the lemon juice in the beans helps cut through the heaviness of the meat and potatoes, cleaning your palate between bites.
I also love serving them with a simple piece of toasted sourdough. You can use the bread to soak up any extra garlic butter left on the plate. It's a small detail, but it's the kind of thing that makes a simple meal feel like a treat.
Why You'll Love This Recipe
Honestly, the reason this works is that it takes the pressure off. We've all had those nights where we're too tired to prep fresh vegetables. Instead of skipping the greens or serving something bland, you're using a bit of technique to make a pantry staple taste like effort.
It's about accessibility. You don't need to be a pro to get a great result here. You just need a pan, some butter, and about 15 minutes. It's a reliable, joyful way to get dinner on the table without the stress.
Next time you're staring at those cans in the back of the cupboard, don't just boil them. Give them the butter and garlic treatment. You'll be surprised at how a few simple additions can change your whole perspective on canned vegetables.
Recipe FAQs
How to make canned green beans taste awesome?
Sauté them in butter with minced garlic for 5-7 minutes. Adding fresh lemon juice at the end brightens the flavor and removes the "canned" taste.
Is it true you should cook canned beans in their own liquid?
Not true. Rinse the beans under cold water and pat them dry so they sauté in butter rather than steaming in the brine.
Why do restaurant green beans taste so rich?
They often use a high ratio of butter and aromatic garlic. Sautéing the beans until they develop a glossy sheen mimics that professional finish.
What is the best way to season canned beans?
Use kosher salt, freshly cracked black pepper, and a squeeze of lemon. These additions enhance the natural flavor without overpowering the beans.
Which sides pair well with these beans?
Serve these with a hearty main or a sweet dessert like homemade shortcake. The buttery saltiness of the beans creates a great contrast with a sweet treat.
Buttery Canned Green Beans