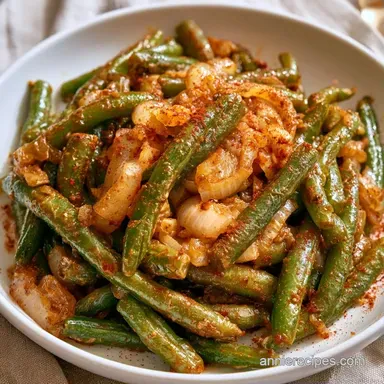
Canned Green Beans with Onion in 10 Minutes

- Duration: 5 mins active, 10 mins on the stove
- Taste Profile: Buttery, savory, and lightly charred
- Best for: Hectic weeknights or a fast festive accompaniment
There is something wonderful about the sound of melting butter and the aroma of sautéing onions. For a long time, I steered clear of canned beans because they often had a distinct metallic tang and a dull, grayish color that lacked appeal. Simply reheating them usually led to a soggy, uninspiring result.
The secret was simply getting rid of the canning liquid. By approaching these pantry staples like fresh produce instead of a microwave meal, the results improved dramatically. You can achieve a flavorful side dish without having to visit a farmer's market or tend to a garden.
This take on Canned Green Beans with Onion focuses on efficiency and taste. It is the perfect solution for those exhausted evenings when you still crave a cozy vegetable on your plate. You can go from pantry to table in just 15 minutes.
Savory Canned Green Beans with Onion
The Brine Reset: Rinsing the beans under cold water strips away the salty, metallic canning liquid. This lets the butter and smoked paprika actually stick to the beans instead of sliding off.
The Quick Sear: Since the beans are already cooked, we aren't "cooking" them so much as browning them. A higher heat for a short time creates a golden char that mimics the taste of fresh sautéed vegetables.
If you're looking for more ways to use pantry staples, you might like this Beans in 15 Minutes recipe which uses a similar fast sear method.
Recipe Specs
When you're in a rush, you need to know exactly how the "fast" version differs from the "slow" way. Most people think you have to simmer canned beans for an hour with a ham hock to get flavor, but that usually just turns them into mush.
| Method | Time | Texture | Best For |
|---|---|---|---|
| Quick Sauté | 15 mins | Firmer, charred | Weeknight dinners |
| Slow Simmer | 1 hour | Very soft, tender | Traditional holiday feasts |
- For a smokier taste
- Use 1 tsp of smoked paprika instead of 1/2 tsp.
- For a sharper bite
- Add the garlic at the very end.
- For a richer finish
- Stir in a tablespoon of heavy cream right before serving.
Shopping List Breakdown
The beauty of this dish is that most of this is probably already in your kitchen. The yellow onion is the workhorse here, providing a sweet, caramelized base that cuts through the saltiness of the beans. I prefer yellow over white because it browns better and has a deeper flavor.
The smoked paprika is a non negotiable for me. It provides that "cooked all day" depth without the actual wait time. If you don't have it, regular paprika works, but you lose that woody, campfire note.
The butter and olive oil duo is a classic move, as the oil prevents the butter from burning while the butter provides the rich, glossy finish.
The Base
The beans are the core. I use cut green beans because they have more surface area to catch the butter and onions.
The Aromatics
Garlic and onion create the savory foundation. Dicing the onion finely ensures you get a bit of sweetness in every single bite.
The Seasoning
Black pepper, salt, and red pepper flakes add the heat and balance. The red pepper flakes aren't meant to make it "spicy," just to give it a little wake up call.
Ingredients & Substitutes
- 2 (14.5 oz / 411g) cans cut green beans, drained and rinsed Why this? Standard size, easy to find.
- 1 medium yellow onion, finely diced Why this? Sweeter when browned.
- 3 cloves garlic, minced Why this? Adds a pungent, savory punch.
- 2 tbsp (28g) unsalted butter Why this? For a rich, buttery glaze.
- 1 tbsp (15ml) extra virgin olive oil Why this? Raises the smoke point of the butter.
- 1/2 tsp (3g) smoked paprika Why this? Adds a hint of wood fired flavor.
- 1/4 tsp (1g) black pepper Why this? Basic earthy heat.
- 1/4 tsp (1g) salt Why this? Enhances all other flavors.
- 1/4 tsp (1g) crushed red pepper flakes Why this? Subtle, warming back note.
| Original Ingredient | Substitute | Why It Works |
|---|---|---|
| Unsalted Butter | Vegan Butter | Similar fat profile. Note: Check for salt content. |
| Yellow Onion | Shallots | Finer, sweeter taste. Use 3-4 large shallots. |
| Smoked Paprika | Cumin + Paprika | Mimics the earthiness. Note: Slightly different flavor profile. |
| Olive Oil | Avocado Oil | High smoke point. No flavor change. |
Equipment Needed
Keep things simple to minimize the cleanup; using just a few basic tools is the way to go.
A large skillet is your most essential piece of equipment. I recommend stainless steel or cast iron for superior heat retention and a better golden sear. While a non-stick pan still works, you'll miss out on some of those flavorful browned bits on the beans.
A colander is a must for rinsing. Avoid simply draining the liquid through the can lid, as that leaves too much salty brine behind. A quick rinse under the tap makes a significant difference. Finally, a wooden spoon or a sturdy spatula is all you need to toss the beans gently.
The Cooking Process
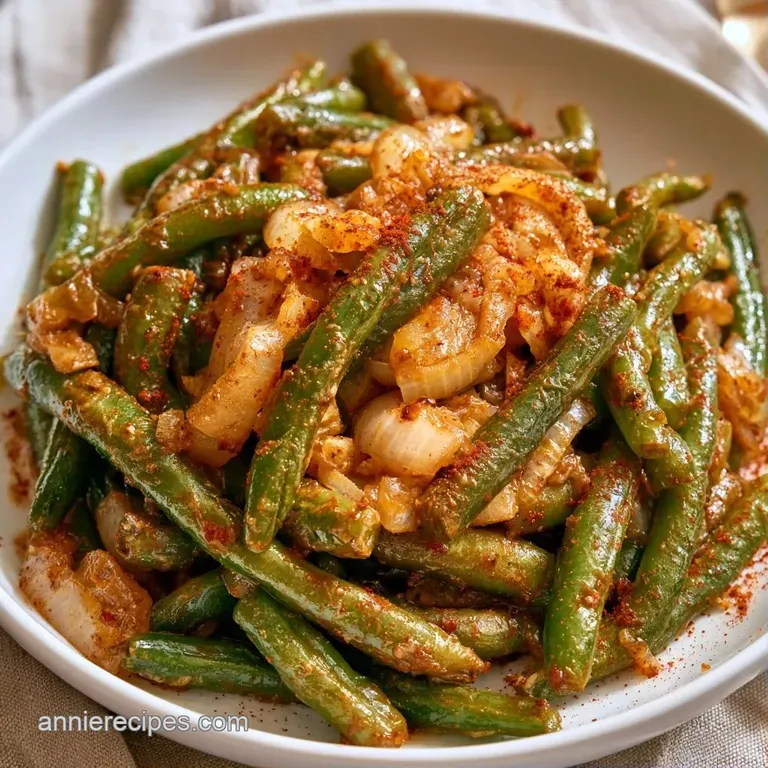
1. The Prep Phase
Drain the canned green beans into a colander and rinse under cold running water for 30 seconds. Shake off excess water to ensure the beans sear properly. If they're too wet, they'll steam instead of brown.
2. The Sauté Phase
Place a large skillet over medium heat and add the olive oil and butter. Once the butter is melted and foaming, add the diced onion and sauté for 5–7 minutes until translucent and golden brown. Stir in the minced garlic and cook for 30 seconds until fragrant.
3. The Finishing Phase
Increase heat to medium high. Add the rinsed green beans, smoked paprika, salt, and pepper. Gently toss to coat. Cook for 3–5 minutes without over stirring until you see a slight golden char on the edges of the beans. Remove from heat and serve immediately.
Chef Note: Resist the urge to stir the beans every ten seconds. Let them sit against the hot pan for a minute or two to get those brown spots. That's where the flavor lives.
Fixing Common Texture Issues
The biggest risk with canned beans is overworking them. They've already been processed and cooked, so they're much softer than fresh beans. If you treat them like raw vegetables, they'll disintegrate.
Another common issue is the salt. Canned beans are already salted, and if you add too much more, it can become overwhelming. Always taste the beans after the first toss before adding extra salt.
The Beans Became Mushy
This usually happens if you stir too much or cook them too long on the heat. Canned beans only need a quick sear to warm through and brown.
The Dish Tastes Too Salty
If the brine wasn't rinsed off well enough, the salt can concentrate as the water evaporates. A squeeze of fresh lemon juice or a teaspoon of apple cider vinegar can cut through the salt.
| Problem | Fix |
|---|---|
| Mushy beans | Fold gently; cook for max 5 mins |
| Too salty | Add a splash of lemon juice or vinegar |
| No browning | Increase heat to medium high; stir less |
| Garlic burnt | Lower heat before adding garlic; cook 30s only |
Perfect Complements
These beans are a classic side, but they really shine when paired with something hearty. I love serving them alongside a roast chicken or some pan seared pork chops. The acidity and sweetness of the onions balance out the richness of the meat.
If you want to make this a full meal, try serving them over a bed of mashed potatoes or a piece of crusty sourdough bread to soak up the leftover butter. For a more traditional feel, they go great with a side of corn bread.
If you have some leftover bacon in the fridge, you can toss it in during the sauté phase. For a more detailed version of that, check out my Green Beans with Bacon recipe recipe. It adds a smoky, salty layer that makes the dish feel like a Sunday dinner.
Make-ahead and Leftover Tips
Any remaining portions can be kept in a sealed glass jar and refrigerated for up to 3 days. While they stay delicious, some of that original charred flavor may fade.
Try to skip the microwave when warming them up, as it often makes the beans overly mushy. Instead, return them to a pan over medium heat for 2–3 minutes with a small knob of butter. This restores the crispiness and the right bite.
To minimize waste, save those onion skins. I store my veggie scraps in a freezer bag and, once full, simmer them with water and some peppercorns to create a simple vegetable stock. You can even use the remaining butter in the pan to brown a slice of toast for a fast snack.
Make It Your Own
One of the best things about Canned Green Beans with Onion is how easy they are to tweak. You can change the flavor profile entirely just by swapping one or two ingredients.
The Smoky Southern Style
Add a pinch of brown sugar and a dash of Worcestershire sauce during the finishing phase. This gives the beans a sweet and savory depth that feels very traditional.
The Pantry Shortcut
If you're out of fresh onions, you can actually use a tablespoon of onion powder and a bit of extra butter. It won't have the same texture as caramelized onions, but it's a lifesaver when the pantry is bare.
The Garlic Heavy Twist
Double the garlic and add a pinch of dried oregano. This moves the dish in a more Mediterranean direction and pairs beautifully with grilled fish or shrimp.
The Plant Based Swap
Replace the butter with a high-quality vegan butter or just use more olive oil. Since the flavor comes mostly from the aromatics and the paprika, you won't lose much by skipping the dairy.
High in Sodium
815 mg 815 mg of sodium per serving (35% 35% of daily value)
The American Heart Association recommends a daily sodium limit of no more than 2,300 mg for most adults to maintain heart health.
Tips to Reduce Sodium
-
Omit Added Salt-25%
Remove the 1/4 tsp of salt completely. Between the canned beans and the butter, there is already significant sodium present.
-
Use Fresh or Frozen Beans-20%
Replace the canned green beans with fresh or frozen (no salt added) green beans to eliminate the sodium used in the canning process.
-
Add Bright Acidity
Stir in a squeeze of fresh lemon juice or a teaspoon of apple cider vinegar at the end of cooking to mimic the brightness of salt.
-
Boost with Fresh Herbs
Add freshly chopped parsley or thyme to increase the flavor profile and aromatic depth without adding any sodium.
-
Increase Aromatics
Double the amount of minced garlic and diced onion to create a more savory base, reducing the need for salt.
Recipe FAQs
Do green beans and onions pair well together?
They create a savory base that effectively eliminates the metallic canned taste.
Tip: Sauté the onion until golden brown for a deeper, sweeter flavor.
Which spices best improve canned green beans?
Use smoked paprika, salt, pepper, and crushed red pepper flakes.
Tip: Add the spices just before searing to keep them from burning.
How to achieve a Southern style flavor?
Simmer with aromatics or apply the fat-rendering technique used in southern smothered beans.
Tip: Let the beans char slightly in the pan to mimic a slow cooked texture.
Is it true that you should heat canned beans in their own liquid?
This one's false: Rinsing the brine under cold water for 30 seconds removes the metallic taste.
Tip: Shake off excess water thoroughly so the butter can sear the beans.
What is the best way to avoid mushy beans?
Sauté them over medium high heat for only 3 to 5 minutes.
Tip: Avoid over stirring the pan to allow a golden char to develop.
Can you add onions during the canning process itself?
Actually, no, because adding low-acid vegetables can interfere with canning safety.
Tip: Add your fresh onions during the final sauté for the best flavor.
Should I use a large skillet for this recipe?
A wide skillet provides the necessary surface area to sear rather than steam.
Tip: If the pan is too crowded, cook the beans in batches.
Canned Green Beans With Onion