Savory Soy Garlic Canned Green Beans
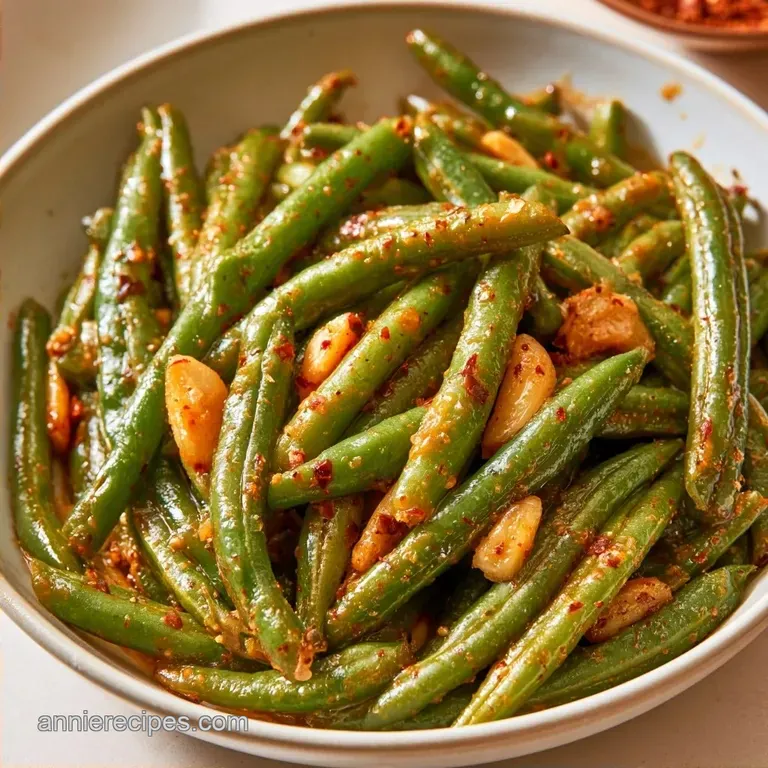
- Time: 5 minutes prep + 10 minutes cooking
- Highlight: Glossy, mahogany glaze with a punch of garlic
- Perfect for: Hectic weeknights or pantry-only meals
Quick Soy Garlic Canned Green Beans
I can still smell the garlic hitting the hot butter from the first time I made this. I was staring at a near empty fridge on a Tuesday, and all I had were a couple of cans of green beans. Usually, I'd just heat them up and call it a day, but I decided to treat them like a stir fry.
The result was a total surprise. By rinsing the beans and hitting them with a quick soy and sugar glaze, they stopped tasting like "canned food" and started tasting like a real side dish. Trust me on this, it's a total lifesaver when you don't have time to trim fresh veg.
You can expect a savory, umami rich flavor that clings to the beans. The Soy Garlic Canned Green Beans don't get mushy if you follow the heat rules, and they take about 15 minutes from start to finish. It's an accessible way to get something green on the table without the prep stress.
The Quick Details
This dish is incredibly quick, so you won't be stuck at the stove for an hour.
Active prep takes only 5 minutes, primarily for rinsing and drying the beans, while the cooking itself takes 10 minutes. In total, you're looking at 15 minutes a perfect choice for those who find cooking tedious after a full workday.
It yields 4 servings, making it an ideal side for a main protein. Since it relies on pantry staples, it's very convenient; you probably already have the necessary ingredients in your kitchen.
Why These Flavors Work
I've found a few things that make this actually taste good instead of just "okay." It's all about how the ingredients react to the heat.
- Cold Water Rinse: Washing the beans removes the metallic tin taste and excess sodium.
- Brown Sugar: The sugar melts and browns quickly, creating a thick glaze that sticks.
- Butter: The fat carries the garlic flavor and balances the salt from the soy sauce.
Serious Eats' testing on vegetables suggests that removing excess surface moisture is the only way to get a sear, which is why we pat these beans dry first. If they're wet, they just steam and turn into mush.
What You'll Need
I stick with unsalted butter to keep the sodium levels in check, since the soy sauce is already quite salty. Here is the breakdown.
| Ingredient | Role | If You Don't Have It |
|---|---|---|
| Canned Green Beans | The base | Fresh beans (blanch them first) |
| Unsalted Butter | Richness/Fat | Olive oil or coconut oil |
| Garlic | Aroma | Garlic powder (use 1 tsp) |
| Soy Sauce | Salt/Umami | Tamari or coconut aminos |
| Brown Sugar | Glaze/Sweetness | Honey or maple syrup |
| Red Pepper Flakes | Heat | A pinch of cayenne |
Let's examine the ingredients in more detail.
- 2 cans (14.5 oz / 411g each) canned green beans, drained and rinsed
- 2 tbsp (28g) unsalted butter Why this? Controls the final salt level
- 3 cloves (15g) garlic, minced
- 1/2 tsp (2.5g) red pepper flakes
- 2 tbsp (30ml) soy sauce Why this? Provides the deep umami base
- 1 tbsp (12g) brown sugar, packed Why this? Creates the mahogany color
- 1/4 tsp (1.5g) black pepper
You may prefer a creamier option for a different flavor profile. For a completely different approach, my Avocado Ranch Sauce is a great dip for other fresh veggies.
Tools For The Job
Any standard kitchen equipment will work for this.
The most critical tool is a wide skillet. You need ample surface area to let the beans spread out; if the pan is too crowded, the sauce won't reduce efficiently, leaving you with a soupy consistency rather than a thick glaze.
You will also need a colander for rinsing the beans and paper towels to dry them. I prefer using a silicone spatula to toss the beans gently, which prevents them from breaking.
Cooking step by step
Let's crack on. Follow these steps to get the texture just right.
- Rinse the drained canned green beans under cold water. Note: This removes the canned liquid taste.
- Pat them dry with a paper towel. Ensure they are dry so they sear rather than steam.
- Place a skillet over medium high heat and add the butter.
- Stir in the minced garlic and red pepper flakes once the butter bubbles. Sauté 30-60 seconds until fragrant and pale golden.
- Add the dried green beans to the skillet.
- Stir to coat the beans in the garlic butter.
- Pour the soy sauce and brown sugar over the beans.
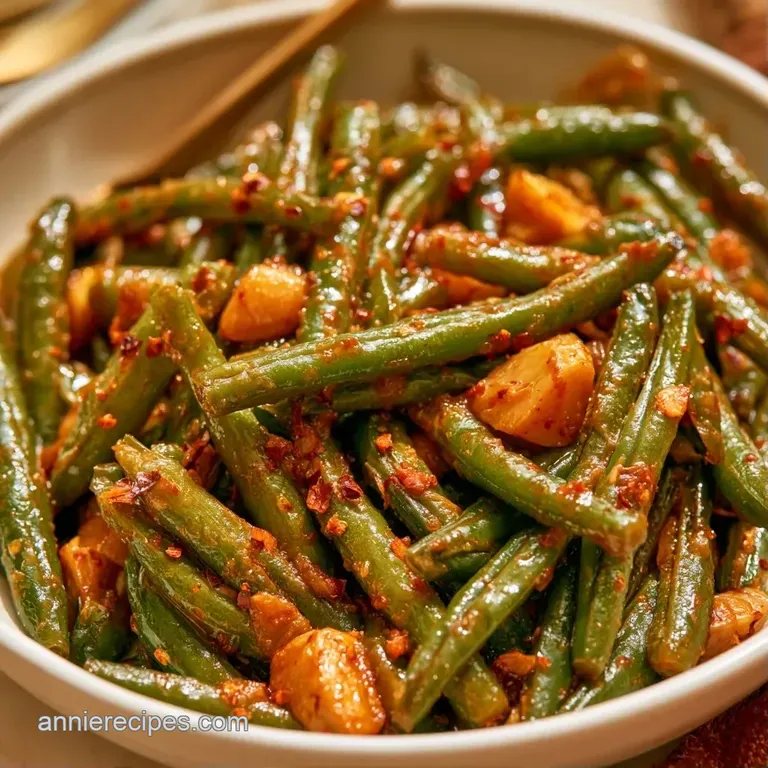
- Stir continuously for 3-5 minutes until the sauce reduces and thickens into a glossy, mahogany colored glaze.
- Remove from heat immediately once the sauce is velvety and coats the beans evenly.
Fixing Common Issues
Canned beans are already cooked, so the biggest risk is overworking them. If you're too aggressive with the spatula, you'll end up with bean mash.
Fixing Mushy Beans
Mushiness happens when you stir too often or cook them for too long. Since the beans are already soft from the canning process, you're only heating them through. Use a gentle folding motion.
Managing Salt Levels
Some canned beans are saltier than others. If the dish tastes too salty, a tiny squeeze of lime juice or a teaspoon of apple cider vinegar can cut through the sodium.
Achieving the Gloss
If your sauce looks watery, it hasn't reduced enough. Keep it on the heat for another minute, stirring constantly. The sugar needs to reach a certain temperature to turn into that thick syrup.
| Problem | Root Cause | Solution |
|---|---|---|
| Beans are mushy | Over stirring or overcooking | Use a folding motion; cook only 3-5 mins |
| Sauce is too thin | Not enough reduction | Simmer 1-2 mins longer on medium high |
| Taste is too "tinny" | Didn't rinse enough | Rinse under cold water for 30 seconds |
| Garlic is bitter | Garlic burnt in butter | Sauté for max 60 seconds; lower heat if needed |
Ways to Swap
This recipe is flexible enough to suit your dietary needs. Skip the low-fat butter, as the fat is essential for getting the sauce to cling to the vegetables.
Soy Garlic Canned Green Beans Vegan
For a vegan version, simply replace the butter with a neutral oil or a vegan butter substitute. Because the soy sauce and brown sugar are already plant based, the flavor stays the same.
Soy Garlic Canned Green Beans Vegetarian
This recipe is naturally vegetarian. If you'd like to add more bulk, try stirring in some canned water chestnuts for a crunch that contrasts with the soft beans.
The Honey Swap
If you're out of brown sugar, honey is a wonderful substitute. It offers a slightly different, more floral sweetness. Just be aware that honey can burn more quickly, so monitor the heat.
| Original Ingredient | Substitute | Why It Works |
|---|---|---|
| Unsalted Butter | Olive Oil | Same fat function. Note: Lacks the creamy flavor of butter |
| Brown Sugar | Maple Syrup | Similar sugar profile. Note: Makes the glaze slightly thinner |
| Soy Sauce | Coconut Aminos | Lower sodium, soy free. Note: Slightly sweeter than soy |
Storage and Leftovers
Store any leftovers in a sealed container in the refrigerator for 3-4 days.
To reheat, I suggest using a skillet over medium heat for 2-3 minutes. Stirring in a teaspoon of water helps the glaze loosen up again. I'd avoid the microwave, as it can make the beans too mushy.
To minimize waste, don't wash away any glaze left in the pan. Instead, toss in some cooked rice or quinoa for a quick, savory side.
Best Side Pairings
Due to their bold, savory flavor, these beans pair best with proteins that are more neutral.
They are a wonderful accompaniment to roasted chicken or grilled salmon. For a more filling option, try serving them with a Beef Stew recipe for a cozy dinner.
For a complete meal, serve them atop steamed jasmine rice. The rice absorbs the soy garlic sauce, which is truly the best part of the dish.
Decision Shortcut
- For more heat: add extra red pepper flakes.
- For a richer glaze: simmer the sauce for 1 minute longer.
- For lower sodium: use low sodium soy sauce.
Pantry Myths
There is a common belief that canned vegetables offer no nutritional value, but that's incorrect; most are processed while at their peak. Another misconception is that preparing fresh beans requires 20 minutes of effort.
This recipe shows you can achieve a delicious result in only 15 minutes.
According to USDA FoodData Central, green beans are a great source of vitamin K and fiber, whether they are canned or fresh. The trick is simply to rinse off the extra canning liquid.
Recipe FAQs
How do I make soy garlic canned green beans?
Sauté garlic and red pepper flakes in butter, then stir in drained beans, soy sauce, and brown sugar. Simmer for 3 5 minutes until the sauce becomes a glossy glaze.
When should I add the soy sauce to the pan?
Pour the soy sauce in after the beans have been coated in garlic butter. This ensures the beans sear slightly before the liquid begins to reduce.
Are these soy garlic canned green beans vegetarian?
Yes, this recipe is vegetarian as it uses butter and plant based ingredients. If you loved the sweet salty balance here, you might enjoy the sweet tart contrast found in our rhubarb sauce.
Is it true that canned green beans always taste like the can?
False. Rinsing the drained beans under cold water removes the excess sodium and that distinct canned liquid taste before cooking.
Soy Garlic Canned Green Beans