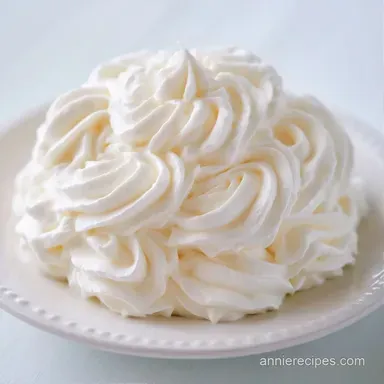
Easy Homemade Whipped Cream: Plush and Stable
- Time: 5 min active + 15 min chilling = Total 20 minutes
- Flavor/Texture Hook: Velvety and plush
- Perfect for: Cake toppings, fruit bowls, or a little treat after dinner
- Homemade Whipped Cream Recipe for Beginners
- Why This Texture Wins
- Component Analysis
- Essential Ingredients and Swaps
- Step-by-Step Whipping Process
- Fixing Common Whipping Issues
- Troubleshooting Common Issues
- Adjusting Your Batch Size
- Busting Whipped Cream Myths
- Storage and Waste Tips
- Garnish and Serving Ideas
- Recipe FAQs
- 📝 Recipe Card
The soft whirr of the hand mixer is my favorite sound in the kitchen. There is something so comforting about watching a liquid swirl into a thick, velvety cloud. It's the ultimate act of love to add a dollop of something handmade to a dessert, rather than using those pressurized cans that taste like chemicals.
I remember one humid July afternoon when I tried to top a berry tart. I didn't chill my bowl, and the cream just sat there, stubbornly liquid, despite me beating it for five minutes. I almost gave up, but then I popped the bowl in the freezer for ten minutes. The difference was night and day.
Once the equipment was ice cold, the cream stiffened up in seconds.
That's the secret I want to share with you. This Homemade Whipped Cream Recipe isn't about fancy equipment, it's about the temperature. When you get the cold factor right, you get a topping that stays put and feels like silk on the tongue.
Homemade Whipped Cream Recipe for Beginners
When you stop buying the store-bought stuff, you realize how much better real cream tastes. It has a clean, milky sweetness that doesn't overwhelm your dessert. Trust me on this, once you see how quick it is, you'll never go back to the aerosol cans.
The goal here is to trap as many tiny air bubbles as possible within the fat of the cream. If the cream is too warm, those bubbles pop, and you're left with a soup. By keeping everything chilled, we ensure the fat stays firm enough to hold those bubbles in place, giving us that plush structure we're after.
Why This Texture Wins
- Fat Globule Network: Beating the cream breaks the fat membranes, allowing them to wrap around air bubbles and create a stable foam.
- Temperature Control: Cold cream has a higher viscosity, which helps it hold air more effectively than room temperature cream.
- Sugar Stabilization: Powdered sugar contains a tiny bit of cornstarch, which acts as a stabilizer to prevent the cream from weeping.
- Aeration Speed: Starting slow prevents splashing and ensures a uniform bubble size, leading to a smoother mouthfeel.
| Feature | Freshly Whipped | store-bought Can |
|---|---|---|
| Texture | Velvety and dense | Airy and bubbly |
| Taste | Pure cream and vanilla | Artificial and metallic |
| Stability | Holds shape for hours | Deflates in minutes |
Component Analysis
| Ingredient | Science Role | Pro Secret |
|---|---|---|
| Heavy Cream | Structural base | Must be at least 36% fat for stability |
| Powdered Sugar | Stabilizer/Sweetener | Sifts instantly into the cream |
| Vanilla Extract | Aromatic depth | Add at the end to keep flavor bright |
Essential Ingredients and Swaps
- 1 cup heavy whipping cream, chilled Why this? High fat content is non negotiable for peaks
- 2 tbsp powdered sugar Why this? Cornstarch helps it stay stiff
- 1 tsp vanilla extract Why this? Balances the richness of the fat
| Original Ingredient | Substitute | Why It Works |
|---|---|---|
| Heavy Cream | Full fat Coconut Cream | Similar fat levels. Note: Adds a distinct coconut flavor |
| Powdered Sugar | Granulated Sugar | Still sweet. Note: Texture is slightly grainier, less stable |
| Vanilla Extract | Maple Syrup | Natural sweetener. Note: Changes the flavor profile to "autumnal" |
If you love a bit of sweetness in your morning, this cream is a great contrast to the crunch of honey toasted granola. Just dollop a spoonful on top of your bowl.
Step-by-step Whipping Process
- Place your mixing bowl and beaters in the freezer for 15 minutes. Note: Cold gear keeps the fat from melting
- Pour the cold heavy cream into the chilled bowl.
- Start the mixer on low speed to avoid splashing.
- Gradually increase speed to medium high until small bubbles form and the liquid thickens.
- Slowly pour in the powdered sugar and vanilla extract.
- Continue beating on medium high speed until the texture becomes velvety.
- Beat for another 30-60 seconds until stiff peaks form.
- Lift the beater to check if the cream stands straight up without drooping.
- Stop mixing immediately. Note: Over mixing leads to butter
Chef's Tip: To make this ultra stable for a cake, add a pinch of cream of tartar (about 1/8 tsp) at the start. It adjusts the pH and helps the protein bonds hold tighter.
Fixing Common Whipping Issues
Troubleshooting Common Issues
| Issue | Solution |
|---|---|
| Why Your Cream is Runny | This usually happens because the cream or the bowl was too warm. If the fat doesn't stay cold, it can't hold the air. According to [Serious Eats](https://www.seriouseats. |
| Why Your Cream is Grainy | Graininess is a warning sign that you are seconds away from making butter. The fat globules have clumped together too much. |
| Why Your Cream Deflates | If the cream loses its volume, it's often because you used granulated sugar without a stabilizer or didn't beat it to a full stiff peak. Ensure you're using powdered sugar for that extra insurance. |
Stability Checklist:
- ✓ Bowl and beaters were frozen for 15 minutes
- ✓ Used heavy cream with 36% fat or higher
- ✓ Beaten to a stiff peak (no drooping)
- ✓ Powdered sugar used instead of granulated
Adjusting Your Batch Size
If you're only making a small treat for yourself, you can easily halve this Homemade Whipped Cream Recipe. Use 1/2 cup cream, 1 tbsp sugar, and 1/2 tsp vanilla. I recommend using a narrower jar or small bowl so the beaters can actually reach the liquid.
For larger parties, you can double or triple the batch, but work in batches if your bowl is small. If you overfill the bowl, you won't get enough air incorporation, and the texture will be dense rather than plush. For a 4x batch, I suggest using a stand mixer such as a KitchenAid to keep your arms from getting tired.
Busting Whipped Cream Myths
Myth: You need a professional stand mixer. Truth: A simple hand mixer or even a whisk and a lot of elbow grease works. The key is the temperature, not the power of the motor.
Myth: Granulated sugar is "wrong". Truth: It's not wrong, but it's harder to dissolve. If you use it, beat the cream for a minute before adding the sugar to ensure the bubbles are already formed.
Storage and Waste Tips
Store your whipped cream in an airtight container in the fridge for up to 2-3 days. It may soften slightly, but you can give it a quick whisk with a fork to bring back the volume. I don't recommend freezing it, as the air bubbles collapse and the texture becomes grainy upon thawing.
To avoid waste, use any leftover heavy cream in a savory sauce for a dinner like my beef stew recipe. Just stir a splash of cream into the pot at the end for a velvety finish.
Garnish and Serving Ideas
Since the cream is a neutral white, I love using color accents to make the dish pop. This is where you can really show some love for the presentation.
- Red Accents: Add a few fresh raspberries or a drizzle of strawberry coulis. This is stunning when topping a slice of chocolate cake.
- Green Accents: A tiny sprig of fresh mint or a dusting of lime zest. This works beautifully with tropical fruits like mango or pineapple.
- Yellow Accents: Tiny bits of lemon zest or a pinch of saffron threads. This adds a bright, citrusy contrast to the richness of the cream.
If you're topping my homemade cinnamon rolls, I suggest adding a tiny pinch of cinnamon on top of the whipped cream for a cozy, monochromatic look.
Recipe FAQs
What are the ingredients for homemade whipped cream?
Heavy whipping cream, powdered sugar, and vanilla extract. These three ingredients provide the necessary fat for structure and a classic sweet flavor.
How to make simple whipped cream?
Chill your bowl and beaters in the freezer for 10 15 minutes. Beat cold heavy cream starting on low speed, then increase to medium high and beat in powdered sugar and vanilla extract until stiff peaks form.
Why is my whipped cream runny?
The cream or the mixing equipment was likely too warm. When the fat in the cream warms up, it cannot hold the air bubbles required for volume.
Can I use granulated sugar instead of powdered sugar?
No, stick with powdered sugar. Powdered sugar contains a small amount of cornstarch that stabilizes the cream and prevents it from deflating.
How do I know when the whipped cream has reached stiff peaks?
Lift the beater straight up from the bowl. The cream should stand straight up without drooping or leaning to the side.
How long can I store homemade whipped cream in the fridge?
Store it in an airtight container for 2 3 days. It makes a perfect pairing for sweetened strawberries if it softens slightly during storage.
Is it true that I can freeze whipped cream for later use?
No, this is a common misconception. Freezing causes the air bubbles to collapse, leaving the texture grainy once it thaws.
Homemade Whipped Cream Recipe