Nutella Chocolate Lava Cookies: Rich and Molten
- Time: Active 30 minutes, Passive 60 minutes, Total 90 minutes
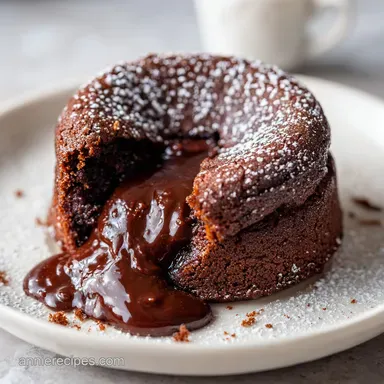
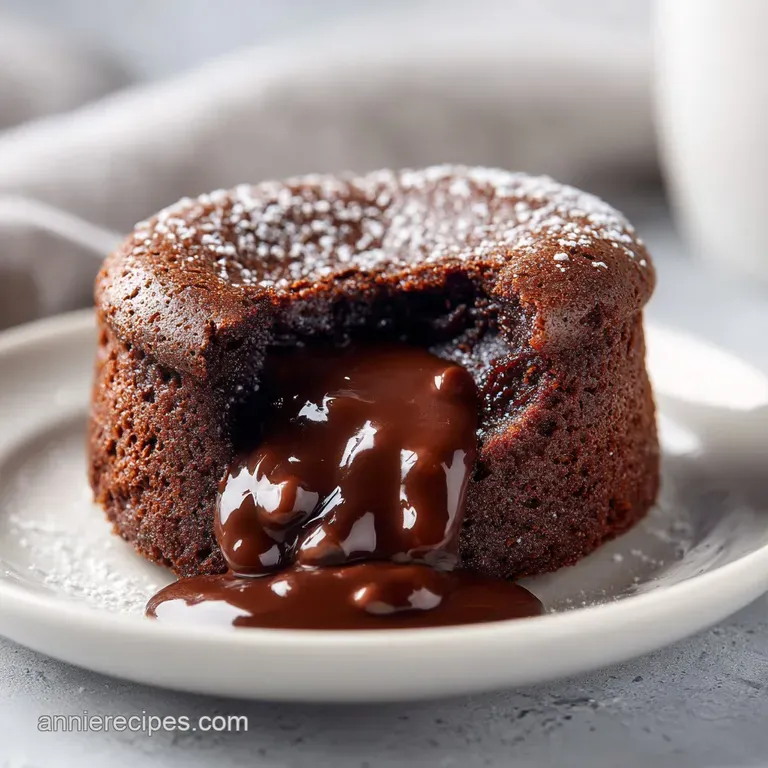
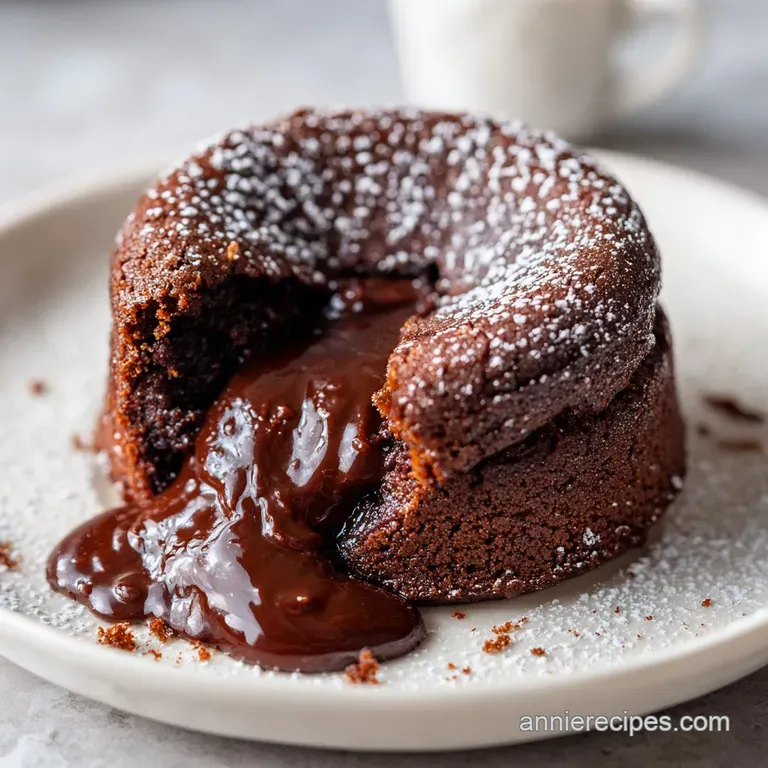
- Flavor/Texture Hook: A shatter crisp cocoa exterior with a rich, velvety Nutella reservoir
- Perfect for: Impressing guests at dinner parties or a cozy weekend baking project
- Mastering the Ultimate Nutella Chocolate Lava Cookies
- Technical Specs for Achieving Perfectly Molten Centers
- Essential Ingredients for Your Next Baking Project
- Professional Kitchen Tools for The Best Results
- Step-by-Step Instructions From Prep to Plating
- Troubleshooting Common Baking Issues and Quick Fixes
- Flavor Variations for Your Chocolate Nutella Cookies
- Storage Guidelines and Zero Waste Kitchen Tips
- Creative Serving Suggestions for Every Occasion
- Recipe FAQs
- 📝 Recipe Card
Mastering the Ultimate Nutella Chocolate Lava Cookies
Have you ever bitten into a cookie that promised a molten center, only to find a sad, chalky clump of chocolate that refused to budge? It is a genuine tragedy. I remember the first time I tried making a chocolate lava cookie recipe without freezing the filling first.
I thought I could just dollop the room temperature hazelnut spread right into the dough. What a mistake that was. The Nutella essentially dissolved into the dough while baking, leaving me with a greasy, flat puddle and a very messy baking sheet.
It was rubbery, oily, and completely lacked that "wow" factor we all crave.
This recipe is the direct fix for that specific failure. We are not just making a cookie, we are engineering a dessert experience that balances a fudgy, brownie like crumb with a center that stays liquid long after it leaves the oven.
By taking the time to properly prep our Nutella chocolate lava cookies, we ensure that the structural integrity of the dough holds up against the high fat content of the filling. This is about more than just taste, it is about the love we put into the process to create something that feels truly special.
When you pull these out of the oven, the aroma of Dutch processed cocoa and toasted hazelnuts will fill your kitchen. The cookies will look slightly underdone, which is exactly what we want. As they cool, the edges will set into a delicate snap, while the interior remains a soft, molten secret.
Trust me, once you see that first wave of chocolate spill out from the center, you will realize why this specific method is the only way to go.
Technical Specs for Achieving Perfectly Molten Centers
The success of these Nutella chocolate lava cookies comes down to temperature control and structural chemistry. Most people skip the freezing step because they are in a rush, but that is exactly why their cookies fail. Here is why this method actually works:
- Flash Freezing Resistance: By freezing the 1/2 cup Nutella into solid teaspoons, we create a thermal barrier that allows the outer dough to bake and set before the center reaches its melting point.
- The Cornstarch Shield: Adding 1 tsp cornstarch interferes with gluten development, creating a "soft batch" texture that stays tender and prevents the cookie from becoming rubbery.
- Dutch Processed pH Balance: Using 1/2 cup Dutch processed cocoa powder means the cocoa has been treated with alkali, making it less acidic and giving it a darker, fudgy color that pairs perfectly with the sweet filling.
- Moisture Retention: The 3/4 cup light brown sugar contains molasses, which attracts moisture and ensures the dough remains chewy rather than crumbly.
Servings and Preparation Calculator
| Servings | Dough Amount | Nutella Filling | Pan Size |
|---|---|---|---|
| 6 Cookies | 1/2 batch | 6 frozen pucks | Small Sheet |
| 12 Cookies | Full batch | 12 frozen pucks | Large Sheet |
| 24 Cookies | 2x batch | 24 frozen pucks | 2 Large Sheets |
Managing the temperature of your kitchen also plays a role. If your house is particularly warm, the dough might become too soft to handle after you've creamed the butter and sugar. If that happens, don't panic.
Just pop the bowl of dough in the fridge for 15 minutes before you start stuffing the cookies.
Essential Ingredients for Your Next Baking Project
Creating a chocolate lava cookies experience requires specific components that provide both flavor and structure. We aren't just looking for sweetness, we are looking for depth. Using a high-quality kosher salt, for instance, helps to cut through the richness of the 150g of Nutella, making the chocolate flavor pop without being cloyingly sweet.
| Ingredient | Science Role | Pro Secret |
|---|---|---|
| 1/2 cup Dutch Cocoa | Structural pH | Sift it to avoid "cocoa bombs" of dry powder |
| 3/4 cup Brown Sugar | Hygroscopic Moisture | Pack it tightly for a denser, fudgier crumb |
| 1 tsp Cornstarch | Gluten Inhibitor | This creates the velvety "melt in-mouth" feel |
| 1/2 cup Butter | Fat Emulsion | Use room temp butter for the best aeration |
Stovetop Skillet vs. Traditional Oven Bake
| Method | Cook Time | Texture Outcome | Best For |
|---|---|---|---|
| Standard Oven | 10 minutes | Crisp edges, soft center | Individual servings |
| Stovetop Skillet | 15 minutes | Extra gooey, caramelized base | Sharing with spoons |
| Air Fryer | 8 minutes | Very crispy exterior | Single quick cravings |
Beyond the science, the ingredients are the heart of the dish. I always recommend using a large egg at room temperature so it emulsifies perfectly with the creamed butter. If you use a cold egg, it can cause the butter to seize up, leading to a lumpy dough that won't spread correctly in the oven.
- 1/2 cup Nutella (150g)
- The star of the show. Why this? Provides the iconic molten hazelnut core.
- 1/2 cup unsalted butter (115g)
- Softened to room temperature. Why this? Allows for proper aeration during creaming.
- 3/4 cup light brown sugar (150g)
- Packed tightly. (Substitute: Dark brown sugar for a deeper molasses taste).
- 1/4 cup granulated white sugar (50g)
- For those crisp edges. (Substitute: Coconut sugar).
- 1 large egg (50g)
- Room temperature is vital. (Substitute: 1/4 cup applesauce, though texture will be cakier).
- 1 tsp vanilla extract
- Enhances the chocolate notes.
- 1.5 cups all purpose flour (190g)
- The structural base. (Substitute: 1:1 gluten-free baking flour).
- 1 tsp cornstarch
- For the "soft batch" effect.
- 1/2 tsp baking soda
- Provides the necessary lift.
- 1/4 tsp kosher salt
- Balances the sugar.
- Flaky sea salt
- For that professional finishing touch.
Professional Kitchen Tools for The Best Results
You don't need a professional laboratory to make lava cookies, but a few specific tools make the process much smoother. A stand mixer is helpful, but I actually enjoy making these with a hand mixer because it gives me a better feel for the texture of the butter. If you are a fan of rich chocolate desserts, you might find this technique reminds you of my Ultimate Fudgy Brownies recipe, where we also focus on that perfect balance of fat and cocoa.
The most important "tool" here is actually a simple plate and some parchment paper. You will need this for the Nutella freezing step. Don't try to use wax paper, as the Nutella can stick to it once it's frozen. Parchment paper allows the frozen pucks to peel right off without leaving half the filling behind.
A cookie scoop is also a game changer here. Using a 2 tablespoon scoop ensures that every giant Nutella stuffed cookie is the exact same size, which means they will all bake evenly. If some are larger than others, the smaller ones will overbake and lose their liquid centers while the larger ones remain raw.
Chef's Note: If you don't have a cookie scoop, use a digital scale to weigh out 40g portions of dough. This precision ensures that the dough to filling ratio is perfect every time.
Step-by-step Instructions From Prep to Plating
1. Pre Portion the Lava Centers
Line a small plate with parchment paper. Scoop 12 individual teaspoons of Nutella (about 150g total) onto the plate. Ensure they are spaced out so they don't merge into one giant blob. Place the plate in the freezer for 30–60 minutes until they are rock solid to the touch.
This is the secret to the Nutella chocolate lava cookies' success.
2. Create the Aerated Butter Base
In a large bowl or stand mixer, cream together the 115g of softened butter, 150g of light brown sugar, and 50g of granulated white sugar. Beat on medium high for 3 minutes until the mixture is pale, fluffy, and looks like wet sand. This aeration is what gives the cookie its height.
3. Incorporate the Liquids
Beat in the large egg and 1 tsp of vanilla extract. Mix for about 30 seconds until the egg is fully absorbed and no streaks remain. Be careful not to overbeat at this stage, or you'll incorporate too much air, which can cause the cookies to puff up and then collapse.
4. Sift and Fold the Dry Shield
Sift the 190g of flour, 45g of cocoa powder, 1 tsp cornstarch, 1/2 tsp baking soda, and 1/4 tsp salt over the wet ingredients. Fold the mixture by hand using a spatula until only a few streaks of flour remain visible. Folding by hand prevents the overdevelopment of gluten.
5. Add the Chocolate Chips
Gently fold in the 90g of semi sweet chocolate chips. This adds a secondary texture to the dough, providing little pockets of melted chocolate alongside the main Nutella core.
6. Encase the Nutella Pucks
Take a portion of dough (about 2 tablespoons) and flatten it in your palm. Remove one frozen Nutella puck from the freezer and place it in the center. Fold the dough up and around the Nutella, pinching the edges until the filling is completely sealed with no visible gaps. If you like the idea of stuffed treats, you should also try these No Cream Cheese Oreo Balls for another crowd pleasing snack.
7. The over High heat Flash Bake
Place the cookies on a baking sheet lined with parchment. Bake at 350°F (175°C) for exactly 10 minutes. The cookies will look soft and slightly shiny on top, but the edges should be set and the house will smell like a chocolate factory.
8. Cooling and Salting
Remove the tray from the oven and immediately sprinkle each cookie with a pinch of flaky sea salt. Let them rest on the hot baking sheet for at least 5 minutes. This "carryover cooking" allows the dough to finish setting while keeping the Nutella lava cookies molten inside.
Troubleshooting Common Baking Issues and Quick Fixes
Even the best home cooks run into trouble sometimes. The most common issue with this Nutella cookie recipe is the "leakage" problem. If your Nutella isn't frozen solid when you stuff it, or if you don't seal the dough properly, the filling will find the path of least resistance and flow out onto the tray.
Why Your Lava Isn't Flowing
If you break open a cookie and the center is solid, you likely overbaked them. Even two extra minutes in the oven can be the difference between a liquid center and a firm one. The cookie should still look "underdone" in the very center when you pull it out.
| Problem | Root Cause | Solution |
|---|---|---|
| Leaking Filling | Weak dough seal | Pinch the dough seams firmly until smooth |
| Dry Cookie | Overbaking | Reduce oven time by 2 minutes next batch |
| Flat Cookies | Warm butter/dough | Chill the dough for 30 mins before baking |
Common Mistakes Checklist:
- ✓ Ensure Nutella is frozen for at least 30 minutes (it should be hard, not tacky)
- ✓ Do not over mix the flour, or the cookie will be tough instead of tender
- ✓ Use a kitchen scale for the 190g of flour to avoid adding too much
- ✓ Let the oven preheat for a full 20 minutes before baking
- ✓ Don't skip the sea salt; it is essential for balancing the 28.2g of sugar per serving
Flavor Variations for Your Chocolate Nutella Cookies
Once you have mastered the basic Nutella chocolate lava cookies, you can start getting creative. The beauty of this dough is its versatility. It acts as a perfect canvas for different "lava" centers or textural additions.
Decision Shortcut: If you want a Salted Caramel twist, place a small Rolo candy inside the frozen Nutella puck before encasing it in dough. If you want a Peanut Butter version, swap the Nutella for frozen teaspoons of creamy peanut butter mixed with a little powdered sugar.
If you want a White Chocolate contrast, use white chocolate chips in the dough instead of semi sweet.
For a smaller batch, you can easily halve this recipe. Since it calls for one egg, simply whisk the egg in a small bowl and use 25g (about half) of the liquid. If you are scaling up for a party, the baking time remains the same, but you must bake in batches.
Never crowd the baking sheet, as this lowers the oven temperature and prevents the cookies from getting those crisp, "shattered" edges.
Storage Guidelines and Zero Waste Kitchen Tips
These cookies are undeniably best served warm, about 10 minutes after they come out of the oven. However, life happens, and you might have leftovers.
- Fridge Storage: Store in an airtight container for up to 4 days. To revive the lava center, microwave each cookie for 10-15 seconds.
- Freezer Storage: You can freeze the unbaked, stuffed cookie balls for up to 3 months. When the craving hits, bake them directly from frozen at 350°F (175°C), adding 2-3 minutes to the total bake time.
- Zero Waste Tip: If you have leftover Nutella on the parchment paper from the freezing step, don't throw it away! Scrape it into your morning coffee or stir it into a bowl of oatmeal. Any broken cookie crumbs can be saved and used as a topping for vanilla ice cream.
One common myth is that Nutella "dries out" in the oven. In reality, the high fat and sugar content keep it liquid. The only reason it would seem dry is if the cookie dough itself absorbs the oils from the Nutella.
This is why our "Cornstarch Shield" and the cocoa powder ratio are so important; they create a barrier that keeps the filling where it belongs.
Creative Serving Suggestions for Every Occasion
To truly live up to the "masterclass" title, we need to think about presentation. How you serve these Nutella chocolate lava cookies can change the entire mood of the meal.
Three Levels of Plating
| Level | Components | Plating Style |
|---|---|---|
| Simple | Warm cookie, glass of milk | Casual and nostalgic |
| Polished | Sifted cocoa, flaky salt, plate | Minimalist and chic |
| Restaurant | Ice cream, berry coulis, mint | Extravagant and bold |
For the "Simple" level, just serve the cookie warm on a small napkin. It is honest and comforting. The "Polished" look involves placing the cookie on a dark ceramic plate and using a fine mesh sieve to dust just a tiny bit of cocoa powder over one half of the cookie, followed by the flaky salt.
If you want the "Restaurant" experience, place a warm cookie in the center of a wide bowl. Add a scoop of high-quality vanilla bean ice cream right on top. The heat from the cookie will start to melt the ice cream, creating a creamy sauce that mingles with the molten Nutella.
For a pop of color, a few fresh raspberries or a drizzle of raspberry coulis provides a tart contrast to the deep chocolate. This turns a simple cookie into a plated dessert that looks like it cost twenty dollars at a bistro.
No matter how you serve them, these cookies are a sweet moment of love shared with your favorite people.
Recipe FAQs
How to prevent the Nutella from leaking out during baking?
Freeze your Nutella portions for at least 30 to 60 minutes until rock solid. Ensuring the dough completely seals the frozen puck before baking is the most effective way to prevent the filling from escaping.
Is it true I can skip the 3-minute creaming step for the butter and sugars?
No, this is a common misconception. Creaming the butter and sugars for the full 3 minutes creates the necessary structure and aeration to support the rich cookie dough.
How to store leftover cookies to keep them fresh?
Keep them in an airtight container for up to 4 days. If you want to restore that signature lava center, simply microwave an individual cookie for 10 15 seconds.
How to bake these cookies if I want to freeze the dough for later?
Bake the stuffed dough balls directly from frozen at 350°F (175°C). Simply increase the baking time by 2 3 minutes compared to the standard 10-minute bake.
Is it necessary to use Dutch processed cocoa powder?
Yes, stick with Dutch processed. It provides a deeper color and smoother flavor profile that balances the sweetness of the Nutella and chocolate chips perfectly.
How to tell if the cookies are finished baking?
Remove them from the oven at exactly 10 minutes. They may appear soft, but they will set as they cool; overbaking past this point will result in a dry texture rather than a molten center.
Should I use salted butter for this recipe?
No, use unsalted butter as listed. Using unsalted butter allows you to control the exact amount of sodium by adding the precise 1/4 teaspoon of kosher salt required for the flavor balance.
Nutella Chocolate Lava Cookies